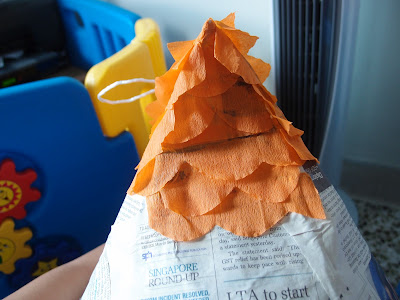
For the little girl's birthday party, I thought of making a DIY Piñata since the ones that I saw around were like S$30. I don't want us to spend that much for something that will be used once for a few minutes during the party!
Thank God for the internet (again) because of endless resources on how to do DIYs! And since we're having animal-themed party, I thought an ombre owl would be a fun and cute. :)
Things you need:
- a balloon
- scissors
- cut up old newspapers
- tape
- pencil
- flour and water mixture (2parts flour + 1part water)
- some cardboard (I used cereal boxes)
- crepe paper or felt paper (orange, brown, yellow)
- white and brown round cardboard for the eyes
- strips for the eye lashes
- triangle for the nose
- big bowl
- strings
- craft glue
Directions:
1. Blow the balloon and knot the end. Set aside.
2. Draw pattern on cardboard box for the head of the owl. Cut out the sides and save them to cover the sides.
3. Tape the cut out board on top of the balloon. Secure the edges with tape.
4. Once you have formed the structure, start with papier mache. Dip the strip of newspapers on the flour mixture. Alternatively, you can you a craft brush or popsicle stick to evenly distribute the paste on the paper and you won't have any lumps on the papers.
5. After making one layer on the balloon, let it dry. During the second layer, insert the string on top. I tried securing it with a stick glue.
If the weather in your area is sunny and warm, it will only probably take an hour or two to dry a layer or the mache. Then you can start working on another one. You can make at least three layers of mache to have a sturdy piñata.
6. Pop the balloon inside by inserting a pin on the bottom. You'd hear something like a hissing sound, that's the air releasing inside.
 |
| Don't worry, this won't hurt. |
 |
| Mark the bottom and cut out |
8. Take out the deflated balloon.
 |
| Take out the deflated balloon |
9. Cut the crepe/felt paper into strips and fold them by 2 inches as shown below:
10. Cut the end with a scallop pattern or alternatively, you can use a round end to make sure it has a good round shape.
11. Once you have prepared several strips, you can start covering your piñata with them. Use a craft glue to make sure they stick on the papier mache.
12. Don't forget to decorate the bottom cut out as it will serve as the cover to be pulled out during the party! :)
As for me, the crepe paper was too sheer and the newspaper of the mache was visible. So I covered it with felt paper and made an ombre with brown, orange and yellow.
 |
| Ready to hoot! |


